
Good day, dear friends and readers :) I am very excited to present today's "Making of" post to you, as it's about a painting which means so much to me and I will admit that it's also one I am rather proud of.
As some of you may know, I participated in the OC Anthology artbook project , a book dedicated to "original characters", created by many wonderful artists. The character I chose for this artbook is one of my most beloved ones, the half-elven bard Levant Shandaer from my novel Broken.
In this article you will see how much planning and work is behind the final version that finally made it into the printed artbook. Please enjoy - and do feel free to comment.
I will confess, when I first applied to the project last year and eventually got in, I was rather...Intimidated. There were so many amazing arists with incredible skills and I was afraid my entry was...Well, going to be a little "pale" in comparison *laughs*. But I decided to give it my all, to see how far I can go and what I can do, if I put my mind completely to it. That's also why I planned on taking my time and giving each and every step, from the first draft to the final piece utmost care.In the end the whole painting took about one month to complete - you will soon see why. Let us begin with the "Making of - Levant Shandaer" - originally painted in winter 2015 and kept secret until today. ♥

The artwork was meant to depict a scene from Levant's life, so I took some time to contemplate how to represent him best. He's a wandering bard and also a fugitive in a way, so I decided a scene from his journeys was going to be most suitable. Also, since I wanted him to look solitary and a little wistful, I intentionally refrained from drawing any other hints of company, be it human or in the shape of animals (although I did originally plan to place a bird on the branch and have him look that way).
It took quite some time until I finally got the composition I wanted - and as usual I did so by creating a rough sketch in Photoshop. It's easier for me to work digitally at this early stage, because the given software tools allow me to resize and shape the various elements of the picture better, until I am satisfied with it. Were I to work traditionally, it would mean having to erase and redraw a lot, or possibly having to redraft the entire piece and I want to save myself the frustration *laughs*.
Once the composition was roughed in, I had it printed in color, twice, in fact. One print showed the drawing in its entirety, background, character and all, and the other had Levant alone, without a background, in full A4 size (thus, around two time larger than he was going to be in the actual piece). I don't usually do this, actually I always do one sketch of the whole drawing, but I wanted to pay close attention to every detail this time. That's also why the next part took twice as long, but was no less crucial: the pencilling stage.
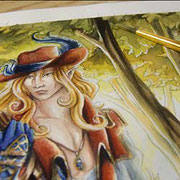
I figured a digital sketch only would look "artificial", so it was rather important to me to do the actual drawing (which was later going to serve as the base for the watercolor-painting) traditionally, in pencil. Only after I finished the two seperate sketches, I scanned them, merged them and lo and behold - I had my final "lineart". But the real work was only just going to begin.
Click on the pictures below to see larger, more detailed versions of the drawings.


Goodness gracious me. What have I done. So many details x.x
...One look at the finished sketch I'd printed and I already knew how difficult it was going to be to transfer it to watercolor paper. So, in order to procrastinate and avoid having to do this -- I mean, err, of course to properly prepare the painting (totally meant to write this, ignore the first part ^_^;;; ) I decided a color concept was in order.
Now THIS is a step I will sometimes do, especially with large pictures and those that have a complex light and color scheme. Planning ahead here makes it easier to pick colors later whilst painting (or drawing) and assures that I will get the mood right in the end. I create this concept in Photoshop as well, in a small thumbnail version, I don't pay attention to details here, the only important part is the mood I want to express. As you can see I went for autumn colors which would go nicely with Levant's clothes and the back-lighting was going to lend him a slightly unearthly "glow". He is, afer all, not entirely human.
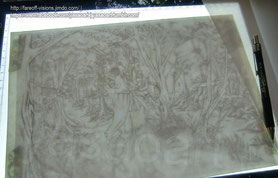
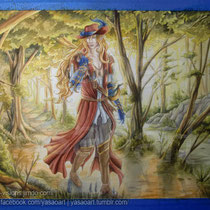
Alas, I could not avoid this step forever *laughs*. As tough as it was going to be, I had to transfer the sketch onto my watercolor paper at some point. Unfortunately for me, my watercolor paper seems to be extremly stubborn, however. Meaning: it's too thick for me to even be able to spot every line, thus clusters of details become blotchy dark spots on the paper. That way, "tracing" ends up being actual redrawing. Well, it's not like it didn't take an enternity to draw this the first time, did it? Wait. It did. Oh. Great. *Sarcasm on*
After I fiiiinally finished the tracing-part and put away my light-table, I briefly contemplated whether I should ink the drawings or leave it be - but in the end the latter was my choice, simply because erasing the pencil after inking was otherwirse going to "injure" the surface of the watercolor paper (and I swear it absolutely wasn't because I didn't feel like retracing every single line AGAIN *coughs*).
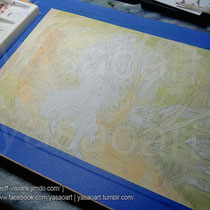
Now the painting took me on a brief quest to our basement, seeking fo a nice wooden board - why, you may wonder? Well, to secure the paper onto it, of course! Masking tape does that job quite well - it doesn't only create a nice white "frame" at the edges afterwards, but it also makes the paper buckle a little less when water is applied.
In the following galery you will see the complete painting process from the first washes 'til the finishing touches. Commentary on the single steps is included in the captions.


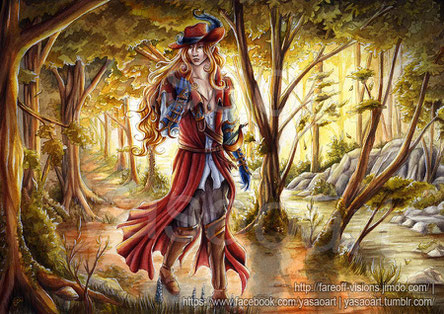
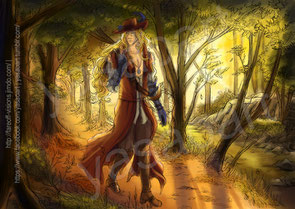
And there you have it. The final painting.
It was a long way until I finished it in early January 2016 and my, it was quite some experience. I learned so much whilst painting it, also since I had not worked on such a large format in quite some time... And to tell the truth, there were many moments when I wanted to give up or thought it wasn't going to be any good, but in the end it was worth every moment I spent on it.
Honestly...Now, that I can hold the artbook in my hands and browse through the pages, seeing all the beautiful drawings everyone did, I can't help but smile. Everyone did so well - and in the end my fear that my drawing might be not "impressive" enough, didn't come true either. I was so happy when the other artists, many of whom I admire, complimented me on my painting. And although I really don't often say this, I am really proud of myself. I challenged myself to do my best and I managed to create a painting which I never thought possible. Of course I still have a lot to learn and my style is far from "perfect", but I can wholeheartedly say that I am happy about my painting ♥
Now, enough sentimental blabbering *laughs* I hope you enjoyed this little insight behind my painting and I would appreciate it if you leave me a comment, either here, or on my facebook page what
you thought of it :)
Thanks for reading, and see you soon!
Write a comment